2012/02/23

3DPF Project

This project is allow us to animate two characters interacting through dialogue and actions. It is means that in our group, we need done two characters things.

Firstly, the most important things was what or which dialogue should we choose? Marietta and I searched lots of videos, sounds clip and movie scripts. In the beginning, we wanted to do KungFu panda, but we founded that there are not had too much more good dialogues for ours. Therefore, we kept search. Finally, we founded our's favourite one from movie---MuLan.


(video)


After that, we discuss how to animate our characters. We need to draw a storyboard for our characters.

What key poses should we use?
Can we made some more interesting poses?
Does the key poses were suitable for the characters?
Should we follow the cartoon to animate our character?

Brought these questions, we started to think our key poses........

By thought and draw two or three classes, finally we done our storyboard.


Totally, our storyboard have 8 main poses, but we will get some more changes during to do our project.

Now, we needed to choose our characters, here is my character(below one), it looks like a tree.


Now, I started to animate my character. 
In the storyboard, I have 8 main poses, therefore, I tried to set them first.
However, I found my character movement looks like a robot.
Therefore, I tried to think more poses and teacher give me a good idea.
He suggested me tried to do some more big changes  like character can fly to the sky.
And he also teach me how to use curve to help the character movement.

All and all, my character key poses are quite different from our storyboard.

Pose1


Pose2


Pose3


Pose4


Pose5


Pose6


Pose7


Pose8


Pose9


Pose10


Pose11


Pose12


Pose13


Pose14


Pose15


Pose16


Pose17


Pose18


That's my all key poses(18 >_<||||||so many key frames)
I know that there are still have some parts get problems like hands and feet, but I think I try my best to do this project. Love it.

Here is my character video


Here is our group video


Okay, that is all my friend Marietta and my works. 
Sometimes, we will dislike animate things, but I think 3D is quite fun for us.
Thanks.


week 4 for Scripting

Exercise 1


For this week, in fact is the E-Learning week, I follow the school notes to continue my 3DPF works. This week is about to use script to finish the animation. (not my likes one) 


A screenshot of lit and rendered cube for exercise 1


First exercise is about by using simple code to control the light to touch one cube. It is quite simple for me.

barrel fall


This part is my favourite part. It is same like below one, type a few of code, the barrel will be fall.


Exercise 2

Zombies


This part is about a zombies. By using the codes, I need create a few of zombies and humans. This parts is quite difficult as I make a lots of mistakes. Therefore, I redo many times and I feel I will become a zombies. My picture is just show a 6 zombies and 2 humans. 

Exercise 3

Exercise4

Exercise5

1.    Imagine you are creating a scene where a car drives along a straight road, but swerves around at random as if the driver is drunk. Do you think it would be useful to know how to program using MEL when creating this scene? Explain.

For this question, I think MEL would not be useful to the sense as the code will not create a random ways to follow. The code may create a straight line for the swerves. Therefore, the MEL code may not useful for the scene.

2.    For the drunken car scene, give TWO advantages and disadvantages (pros and cons) of using scripting to create the swerving car animation.

Advantages: the script will provide a basic movement for the drunken car, and people will see a car's animation by using the script.
Disadvantages: the script also just can create a random movement, the drunken car do not have any key frames, 

3.   You might think that programming using MEL is similar to using ALICE (in Year 1). It is actually very different. Explain TWO of the main differences, as far as you can tell.

Alice is more suitable for a new touch 3D animation's people. However, MEL is more complex for them, which is a higher script or code.


2012/01/15

Week2 Exercise

Exercise 1a

Group Video


This is the group video for exercise 1a, We choose the last part to play it.

5 Screen Shot of the video

Key Pose1

Firstly, this is the beginning position and I am ready to walk to my friend. In this position, it should be notice the shoulder movement and the legs movement. 

Key Pose2

This part, the character move one step and stand straightly. She move the arm and trying to take something.

Key Pose3

It catch the bottom and look at the bottom. Perhaps she was very angry.

Key Pose4

She still look at the bottom. The body move a little bit forward and she tight grip the bottom. Therefore, we know she was very angry. 

Key Pose5

She move the body and quickly throw the bottom. At the same times, she's head also turn to another side.

Exercise 1b


Exercise 2


Reflection:

During this week, I learn key pose is very important for a animation. When people want to make a good animation, firstly, you should make sure that you key poses are selected. And, the week, we make our group video to better understanding how key poses are important in an animation


week1 exercise

1a The facial expression exercise


2a Following the information to make the blendshape


2b Create a new different facial experisson. (I change a little a bit eyebrow and mouth)


3

a.  Does a blendshape require the base mesh and the target mesh to have the same number of vertices? Explain your answer, with reference to how blendshapes actually work.

The blendshape are  using the base mesh and the target mesh to have the same number of vertices.  The blendshape may use the Paint Selection Tool to select the points. Then, creating the deformers – cluster.  Therefore, I can move my selected parts. Sometimes, the blendshape are not a smooth part, so I need edit the cluster weights. Changing some values and make the face more smooth.

b. Can blendshapes only be used for facial animation? If not, prove it! Animate something and post it on your  blog.

Blendshapes is not just use on the facial animation. 


c.  If you want a character to look angry, you might decide to create a target mesh of the character's head and then modify it to have an angry expression. This is NOT how it should be done. Why not? And what would be a better approach? (Hint: you want to give the animator as much freedom as possible.).

All the facial parts should be independent. The face should be like a real person.


Reflection

This is the first week of this term. During this week, I learn more about the facial expressions. How to use the facial tools to complete one word and the whole complete sentence. In fact, the first exercise is not do hard. I just animate the facial parts to do the works.

The  blendshape is quite fun for me. When I use the blendshape tool to move, the face will be move.


2011/12/20

My 3DVA final Project 1 & 2


Here are my 3DVA project1 and project2


Reflection:

This assignment contains two parts.One is the walk cycle and other one is the part of jump cycle. For project 1, I continued to do my class work and tried to adjust the angle of the arms and also need to change the body of the model. Therefore, my model looked like more like a real person. At same times, I know that the graphic tool is quite important to help me to adjust the moving curve.

For project 2, I tried to make the step first, then I continued to finish the jump part. In fact, the first part was quite easy for me. When the model tried to step on the upstire, the foot would cross the box. Therefore, I adjusted the height of the foot to avoid the box. For the second part, I thought it was more different than walk cycle. The jump cycle is different. I setted five poses (I will show it later)to finish the project. Each pose was important to help me to finish the jump part. 

Here is what I am following:


2011/12/01

week 6 Project1 Walk Cycle


Reflection:

This week I learnt how to make the model to walk which was called walk cycle. Walk cycle was a system to make the model to walk. When the model start to animate, I need to calculate the unit of the steps both legs and body. 

2011/11/28

Week5 Big dog animation


Reflection:

Big dog is another animation exercise. This animation need make a few of poses and adjust the bigdog get a balance position. In face, this exercise is more difficult than before parts. We need to do four legs' moving and make sure the whole body get a natural position. During the process, I kept move both two legs moving together which was easy to adjust the angles. At the same times, I kept watch the video to find the key poses.

2011/11/21

Week4 Spider Man Animation

This week learn how to animate the spider man to move:


Reflection:

This exercise is about how to make the spider man move his legs and hip more naturally like a normal person. During the processing, I was carefully to adjust the angle of the hip and tried to make it more naturally. Beside the hip, when the spider man moved, the back and shoulder also need to adjust. Finally, I found that every details and every poses are very important to make the model's animation.


Week4 Normal people moving

Here is a short video about moving  ~\(^o^)/~


Week3 Rigging

This week I learn the rigging:


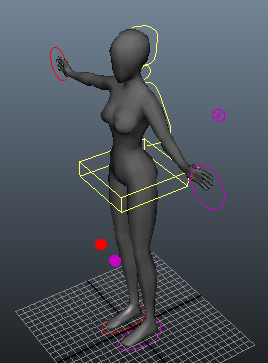
    The normal position with the control lines

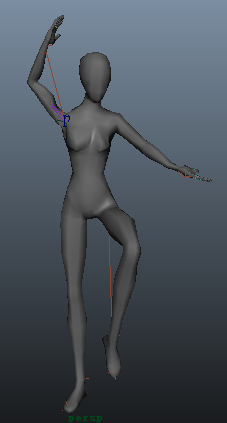
    Pose 1

    Pose 2

    Pose 3


Reflection:

From this week, I follow the online video to make the rigging for my model. In fact, the rigging process is made by two parts. One is making the bone for the model and the other part is make control line to control each part of the model.

For the first part, that was quite easy to me to finish. During this process, I learn how to use mirror tool to create other part of the leg and arm.

The second part was a huge task for me. First of all, I followed the video to made the controller of the legs. The centre point was very important for the controller. If I miss the step, both the controller would be move to another place. After that, I made a sphere to control the angles of knees. Using joint and pole  vector to connect both knees and sphere. Basic on the legs experience, it is more east to create the arm's controls. Add IK handle and also made the shoulder controllers to control the arms.

Last but not least, the model needed to turn the back and head. Therefore, I created the curve lines to control the back.

2011/11/18

Character super T-bag


Theodore "T-Bag" Bagwell


Design and basic drawing:


;
    front and side of the T-bag head.


    Different motions of the T-bag.


    Front body of the T-bag.


    Side of T-bag body.


1. Basic details:
  •  Name:  Theodore Bagwell (T-bag)
  • Tagline:  get on the train” (when the prison uncontrolled, he is always want to out of the prison. Therefore, he always likes to say that sentence.
  •  More introductions: In the prison break, T-bag is a very bad person. He makes lots of serious crimes, such as battery, assault, attempted murder, murder, rape, and kidnapping. It is also insinuated that he is a pedophile.

2. Purpose the story

In the future, T-bag still wants to escape from the Fox River prison and also want to find his treasure which is worth five thousand million dollars. Therefore, T-bag who is the new leader in the Fox River prison are trying to find the different materials and different ways to help he escape the hell.

One day, T-bag heard that the scientists found a new way which can change a normal person become a superman like spider man. At same times, T-bag finds that those scientists are using the prisoners who are in the Fox River prison to make their experiment. As a leader in the prison, T-bag intimidate those scientists if they do not help he escape from the prison, he will tell the reporter the truth.  Therefore, those scientists have to help T-bag become a superman.

After half a year, T-bag became a half auto-superman which means that he change the iron legs and all blood are all change to the superpower iron blood.

Now T-bag trying to PRISON BREAK again…….


3. A key of the character

T-bag wants to prison break and get freedom again which is just like the last time follow Michael Scofield. He is selfish and use different ways to achieve his goal no mater kill the people. However, he also has another side of the life when he faced his son.  Therefore, his is motivated to see his son and want to stay with son forever.


4.  Three appearance-based trailts and three behavior trailts.

Appearance:

T-bag sometimes will have a smile face as the prison is like a hell. In fact, the people who are in the Fox River prison are all know that when T-bag smile which means that there is someone will be dead.

Another feature is his hands. As we all know that T-bag just has one hand can use. Therefore, he really hit someone looking at his other man-made- hand.

A key feature is the eyes. When he trying to make a new bad idea, his eyes are always come out a shape light to shoot the guy and let other person feels scared.
              
Behavior:

T-bag is a selfish and ruthless person. He can kill his best friend and destroyed other family in one second.

He feels he is the king in the Fox River prison sometimes. He controls all the drugs and the news. All these can become the money and power in the prison.

 At the same time, he is more kind to face the doctor as he though doctors are the nice people in the world. It is because when he was young, a young doctor save T-bag and give him one new life.


5. Dialogue sequence between character and scientist.

T-bag: hey new guy, ohoh, sorry our friends, scientist and what is your name?
Scientist: Er, frank.

T-bag: frank, that’s a great name.  Welcome and be carefully. Well, lets start to talk our business, ok?
Scientist: what business?

T-bag: I think you are a smart person, you should know what I want. (Look at the scientist and smile).
Scientist: I don’t know what you are talking about.

T-bag: if all the world people know that your superpower comes from the bad people especially from murder person like me. How dose their feels?  Should the government continue to support your group? If I am the president, I will not. (Laughing)
Scientist: ………


2011/11/13

Week3 Rig exercise

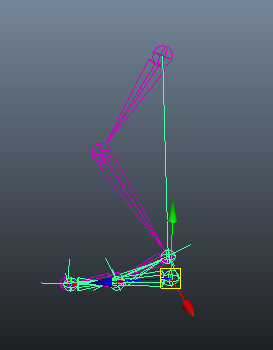
This is reverse foot locker

Reflection:

This week I learn how to add the IK handle to move the body. The video shows to me the details to create the bones and how to link each parts. However, I still lost some parts and the leg still cannot move and I will ask my friends to solve this problem.

The second thing is how to make a reverse foot locker. Most of the times, the bones are quite difficult to control. Therefore, we create the reverse foot locker to make the adjust more easily. The step should be heel(1) --- Ball(2) --- Toe(3) --- Ankle(4).


2011/11/05

Week2 Spider Man Different Poses


Reflection

This week I learnt how to make the spiderman poses. 
Firstly, I feel it quite easy  to do it. However, when I started the work, it feels more difficult.
The arms and the legs are all belongs IK handles, which means when I move the hand, the arms are all automatically followed. Therefore, I must be carefully to make moving and care about the angles. 
Sometimes, IK handles could not change the body to be a suitable position, therefore I also can change to FK handles to adjust the body.
Remember one things : Make the body more natural like a real person.